If your indirect lighting workflow still depends on fragile manual probe setups, you are carrying a hidden bottleneck in both performance and iteration speed. One layout change and the relight cycle becomes a production hitch.
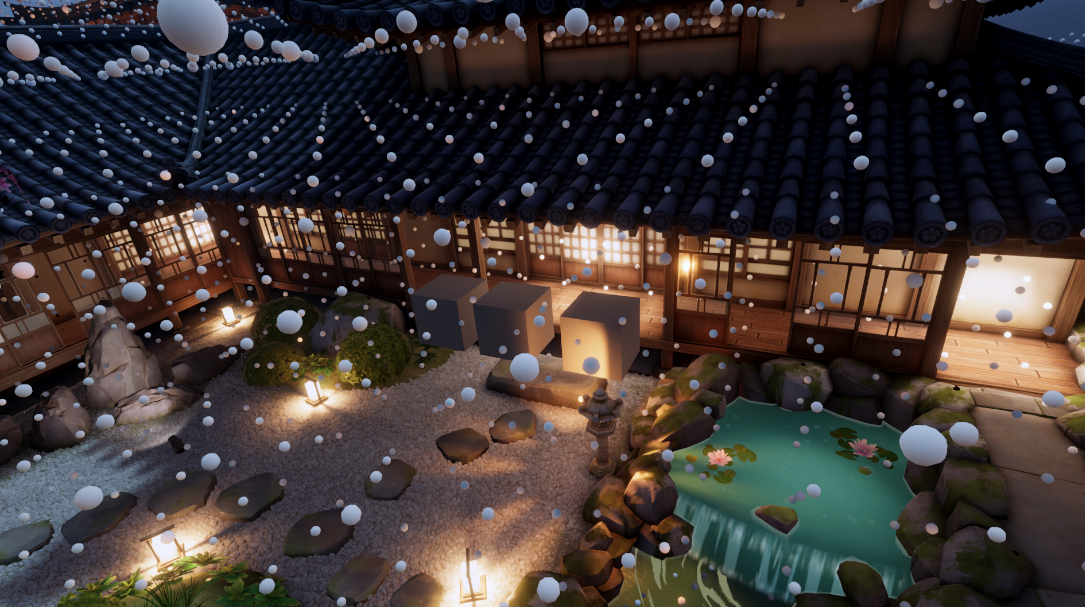
Adaptive Probe Volumes (APV) in Unity 6 gives you precomputed, real-time updated indirect light through a dynamic 3D grid of probes that reshapes itself around your scene’s geometry and lighting needs. You get more probes where they matter, fewer where they do not, and you stop playing the old "sprinkle probes and pray" game.
That matters because APV hits the sweet spot between lighting quality, workflow speed, and runtime cost in complex or dynamic scenes. You get bounced light, color bleeding, and ambient illumination without waiting on soul-crushing rebakes every time lighting, geometry, or layout changes. Compared to fully dynamic GI like ray tracing, it is also much cheaper on the GPU.
What You Can Do In Five Minutes
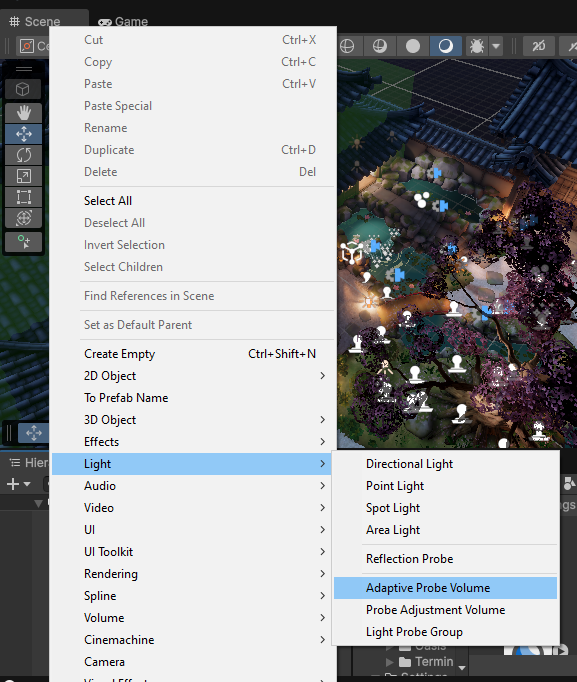
In URP, the first move is simple: open your Pipeline Asset, set Light Probe System to Adaptive Probe Volumes, and add the Adaptive Probe Volume component to a GameObject in the scene. HDRP uses the same APV component, the same setup flow, and the same debugging tools.
Start conservative. Use Local Mode for smaller rooms, tunnels, or enclosed spaces where you want surgical control, and use Global Mode when you need one APV to cover a much larger environment. The trap is obvious: if you push probe density where it does not help lighting, you pay extra memory cost for nothing, and if you ignore empty spaces when dynamic objects need lighting there, those objects can end up looking underlit.
Your First Debug Pass
Before you trust the result, open Window -> Analysis -> Rendering Debugger, then go to Probe Volumes. This is the fastest sanity check in the whole workflow.
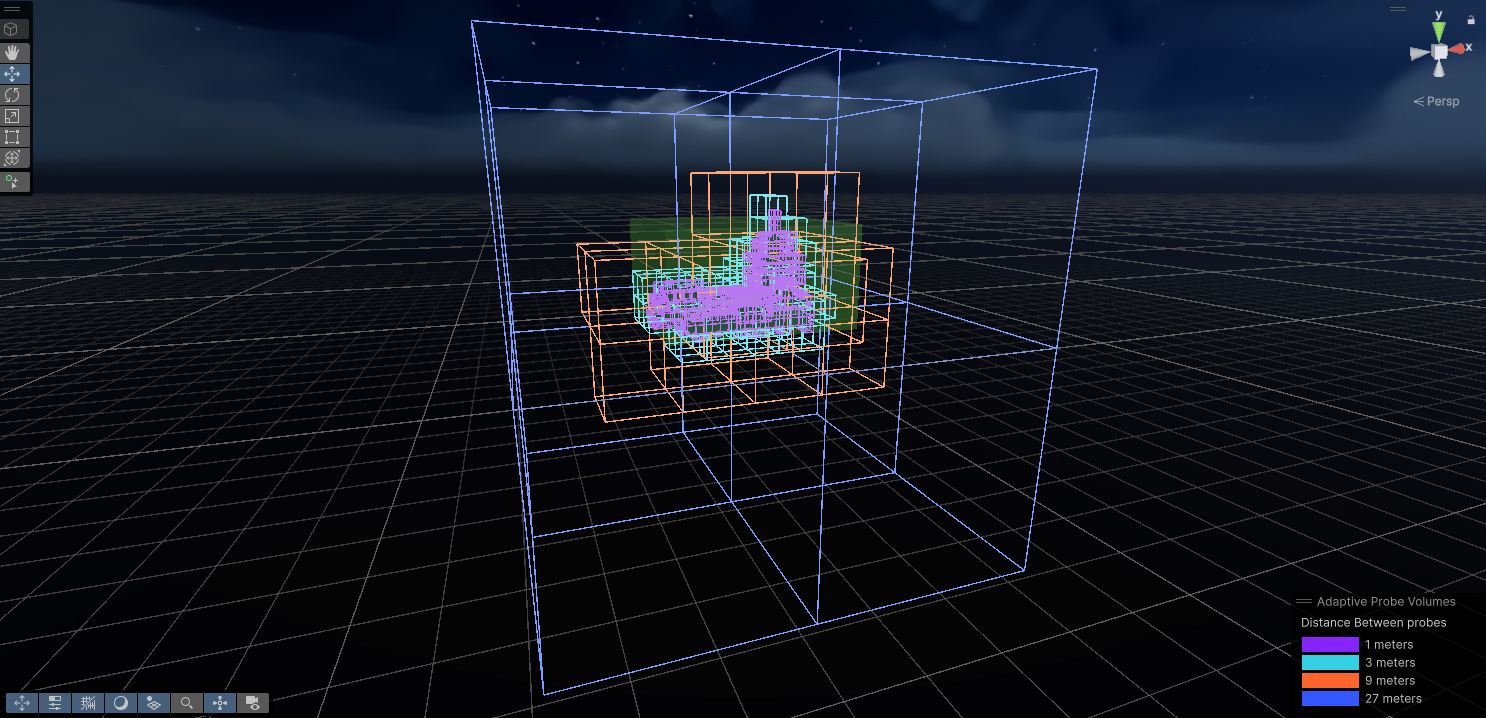
- Display Cells: check how Unity chops the scene into large cells and look for huge unsubdivided gaps where lighting coverage may be missing.
- Display Bricks: inspect the smaller units inside those cells. A brick can hold multiple probes, for example 3x3x3 = 27 probes, which makes it easier to see whether critical areas have enough resolution.
- Reality check: if the bricks are too large, lighting can get soft and mushy. If subdivision goes too far, you start creating overhead that does not earn its keep.
The members-only lesson is where the real operator value starts: the full tuning matrix for local vs global fitting, subdivision overrides, renderer filters, fill-empty-space decisions, the deeper debugging workflow for light leaks and rough transitions, the URP and HDRP internals, and the honest performance answer about when APV beats real-time GI and when a good static lightmap is still cheaper.
CEO/Producer translation: this is not just prettier lighting. It is fewer relight stalls, faster iteration when art changes land, and less schedule panic when indirect lighting starts drifting late in production.
Unlock the full module to get the detailed guardrails, the full video, and the rest of the workflow that keeps APV quality high without letting density, memory, or loading overhead bite you later.
In this module:
- 1. What will this weird "APV" do for you?
- 2. Get Started with APV - NOW
- 3. Debugging APV
- 4. How does APV work?
- 5. The Performance Factors of APV
- 6. Does APV improve performance?
- 7. APV - Advantages and Disadvantages
Join to unlock the full module, audio, and resources.